Introduction to Toy Soldier Craft
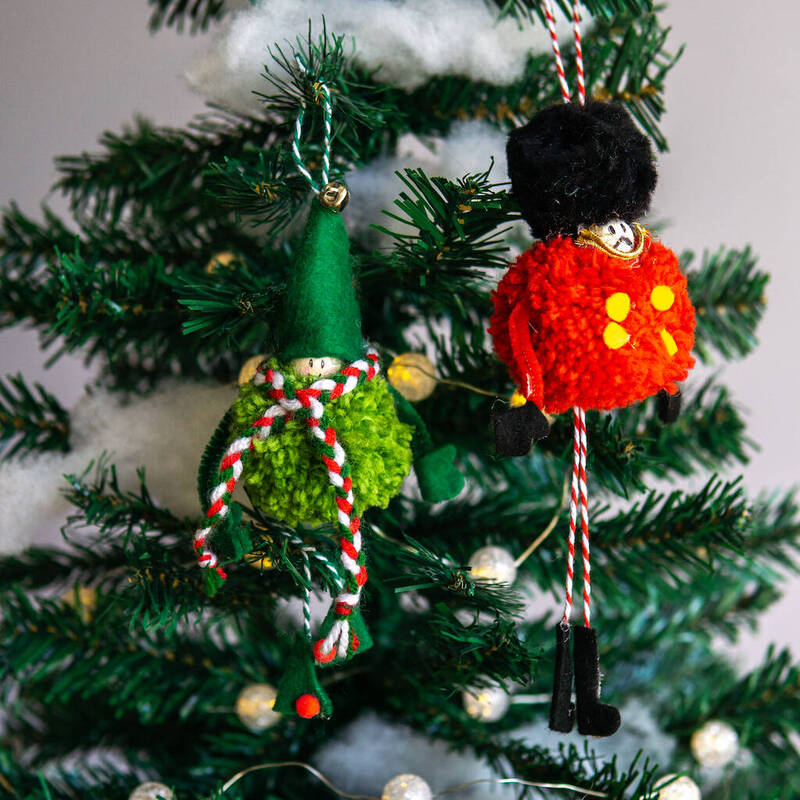
Toy soldier craft ornaments have been a delightful addition to holiday decor for generations. These charming miniatures bring a touch of nostalgia and ceremony to Christmas trees and festive displays. Often handcrafted with care, they can carry sentimental value and become keepsakes passed down through families. Making your own toy soldier ornaments is not only a fun craft activity but also a personal way to contribute to your holiday decorations.
With simple materials like clothespins and paint, you can transform basic items into intricate soldiers ready to guard your festive branches. In this blog, we’ll guide you through creating your very own clothespin toy soldier ornaments. Whether for your own tree or as handmade gifts, these soldiers are sure to stand out in their classic attire. Let’s march into this craft guide and start by gathering the essential materials for your miniature militia.
Essential Materials for Clothespin Toy Soldiers
To craft toy soldier ornaments, you will need some basic supplies. Here’s a simple list of what to gather:
- Clothespins: The classic style that doesn’t open and close works best. It’s your soldier’s body.
- Paint: Acrylic paint in colors like red, blue, and yellow to dress your soldier.
- Paintbrushes: For detailed painting work. Fine tips help with precision.
- Pom Poms: Small ones for the soldier’s hats.
- Glue: A strong water-based super glue is recommended for long-lasting hold.
- Scissors: To trim any decorations or adjust the components.
- Sandpaper: To smooth out any rough edges on the wood.
- Ribbon or String: For creating a loop to hang your ornament.
- Optional Embellishments: Things like gold trim, googly eyes, or small buttons can add character.
For a dressed-up look, consider adding more decorative details. Items like metallic ribbons or flat back crystals bring sparkle. A paint pen can speed up adding face details. If you wish to seal your paintwork, a clear acrylic spray or matte glaze is very handy. Remember, the right materials make crafting easier and more enjoyable. Each soldier you create will be unique, carrying touches of your own craft style.
Step-by-Step Instructions: Cutting and Preparing Components
Creating your DIY toy soldier ornament starts with preparing the basic components accurately. Here’s a breakdown of the steps involved in cutting and readying the pieces that will form your soldier.
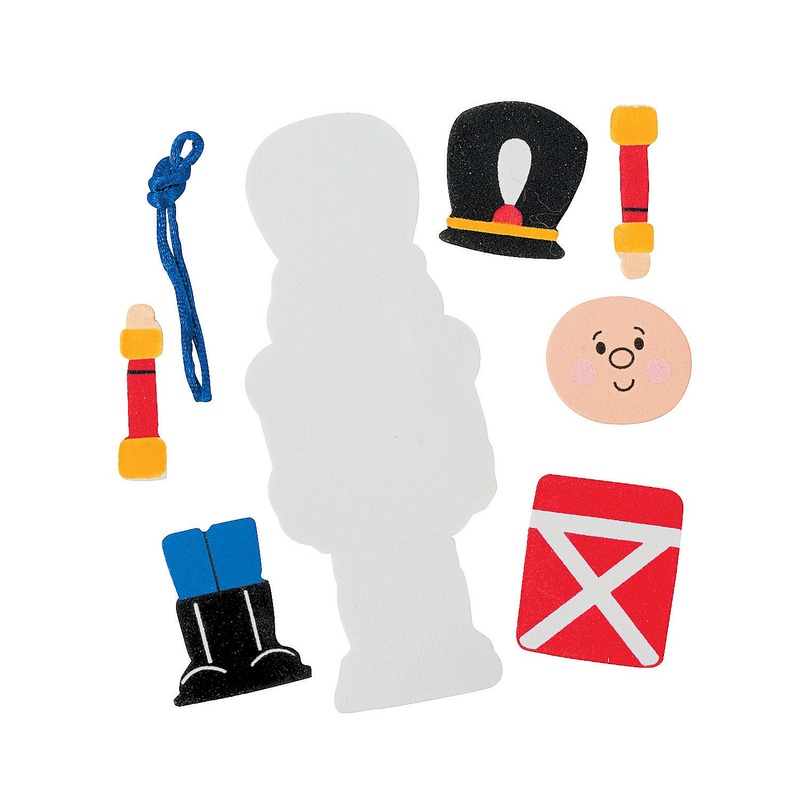
- Trim the Clothespin: Begin by cutting a vintage-style clothespin to form the body of your soldier. It should not have the opening mechanism typical to modern clothespins.
- Prepare the Arms: Take a popsicle stick and cut it to about 1 inch long. Next, split it in half lengthwise to create two arms for your soldier.
- Smooth Edges: Your soldier’s arms and body may have splinters or rough edges. Use fine sandpaper to smooth the surfaces to prep for painting without snags.
- Cut Gold Trim: Measure and cut the gold metallic ribbon or braid needed for the soldier’s chest, waist bands, and hanging loop. Make sure the lengths are appropriate for the size of your clothespin.
- Organize Supplies: Lay out all your materials so they are easy to reach. This includes your clothespins, popsicle sticks, sandpaper, paint, brushes, glue, and any embellishments you plan to use.
By methodically cutting and preparing each component, you set the stage for a successful craft experience. Ensure that you have a clean workspace and that each piece is neatly prepared before you move on to the painting phase of the project.
Painting Techniques for a Realistic Soldier Look
Painting your toy soldier crafts can be fun and bring them to life. Here are tips for a realistic look:
- Base Coat: Start with a base coat of acrylic paint. Blue for pants and red for coats.
- Details Matter: Use fine-tip brushes for tiny details like buttons and belts.
- Face Features: Keep faces simple. A dot for eyes, short lines for eyebrows, small smile.
- Let it Dry: Allow paint to dry fully before adding more layers or details.
- Second Coat: Apply a second coat if needed for vibrant colors and smooth coverage.
- Seal the Paint: If possible, use clear coat spray or glaze to seal the paint.
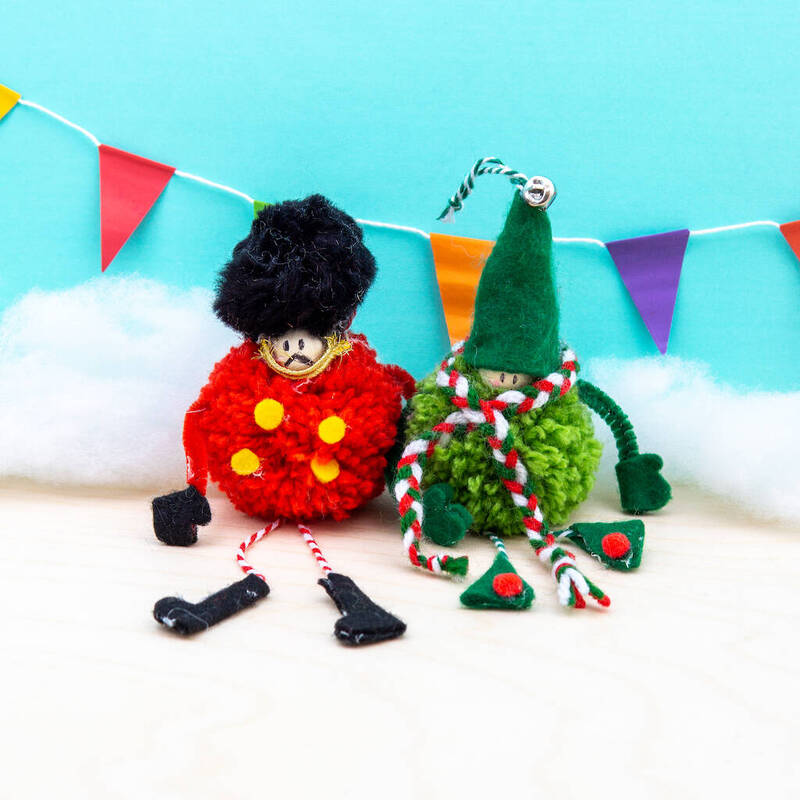
- Pom Pom Hats: Glue pom poms on top for soldier hats. Choose the right size.
Careful with paint types. High-quality paint avoids stickiness and lessens drying time. If using paint pens for convenience, practice a steady hand. For a glossy finish, a sealant can prevent chipping. When drying, lay ornaments flat or hang them to avoid smudges. Remember, patience brings out the best in your toy soldier craft.
Assembly Guide: Gluing and Securing Parts
Once you have painted your toy soldier craft, it’s time to assemble. Here is how:
- Glue the Trim: Start by applying glue to the gold trim for chest and waist. Secure it neatly.
- Attach the Arms: Apply glue where the arms will sit. Press firmly to attach.
- Add the Pom Pom Hat: Glue the pom pom on the head for the hat. Position it well.
- Secure the Parts: Check all parts are tightly glued. Reapply glue if needed for a firm hold.
- Let it Set: Allow the glue to set completely before moving to the next step. Be patient.
For best results, use water-based super glue, as hot glue may not withstand heat in attics. Apply a small amount of glue to avoid mess and ensure a clean finish. Press each part firmly to ensure they bond well. Let the assembled soldier dry fully before adding the hanging loop. Use these steps to create a strong, durable toy soldier ornament that lasts for many holidays.
Creating the Hanging Loop for Your Ornament
Creating a hanging loop is the final touch to make your toy soldier ornament ready for display. Follow these simple steps to add a loop:
- Measure the Ribbon: Cut a piece of ribbon or metallic braid about 6 inches long. This will be your hanging loop.
- Form the Loop: Fold the ribbon in half, forming a loop with the ends together.
- Glue the Ends: Apply a small dab of super glue to the ends of the ribbon.
- Secure the Loop: Attach the glued ends to the back of the soldier’s head or cap. Press firmly until the glue sets.
- Trim Excess Ribbon: If there’s any excess ribbon after gluing, trim it for a neat finish.
- Check the Firmness: Make sure the loop is securely attached and can hold the ornament’s weight.
For a more secure hanging loop, you can also insert a small screw eye into the top of the soldier’s hat before attaching the pom pom. Then, thread the ribbon through the screw eye and tie a knot to secure it. Ensure that the screw eye is tightly fastened to prevent it from coming loose.
By adding a hanging loop, your toy soldier ornament is now ready to take its proud place on the Christmas tree or to be given away as a special handmade gift. Remember to let the glue dry completely before hanging your ornament to avoid any accidents. With the loop in place, your toy soldier is all set to add a touch of handcrafted charm to your holiday decor.
Optional Embellishments for a Personal Touch
Adding personalized touches to your toy soldier ornaments can make them even more special. Here are some suggestions to enhance their appeal:
- Metallic Accents: Use gold or silver ribbon to add a royal touch to your soldiers. Wrap it around the waist or use it for shoulder epaulets.
- Facial Features: With fine paint pens or markers, draw playful faces. You can give each soldier its own expression.
- Glitter: Apply a thin layer of glue on areas you want to highlight and sprinkle some glitter over it. This adds sparkle to your ornament.
- Beaded Buttons: Small beads can serve as buttons for the coat. Glue them down the front for that buttoned-up look.
- Custom Tags: Attach a small tag with a message or the year you made the ornament. This is great for gifts.
- Crown or Hat Detail: Craft a small crown from wire or add trim to the pom pom hat for extra detail.
Remember to let any additional decorations dry well before attaching them to your soldier. These personal touches are what will make your craft truly one-of-a-kind. Choose the right ones that speak to you and reflect the craft’s intended home. Small details often bring the most joy and create lasting memories.
Tips for Preserving Your Toy Soldier Ornaments
Once your toy soldier ornaments are crafted, it’s important to ensure they last for many seasons. Here are some simple yet effective tips for keeping your handmade decorations in excellent condition:
- Avoid Direct Sunlight: Place ornaments away from windows or strong lights. This prevents fading.
- Proper Storage: Wrap each soldier individually in tissue paper or bubble wrap. Store in a cool, dry box.
- Handle with Care: When decorating or packing away, be gentle. Rough handling can damage paint and parts.
- Annual Checks: Each year, inspect ornaments for any wear or loose pieces. Repair as needed.
- Avoid Moisture: Keep ornaments in a dry area to prevent glue from weakening or paint from smearing.
- Dust Regularly: Use a soft brush to gently remove dust. This keeps colors bright and soldiers looking neat.
By following these simple care instructions, you’ll keep your toy soldier ornaments looking sharp and vibrant. Remember to handle them gently and store them properly in the off-season to enjoy their handcrafted charm every holiday.
