Part 1: Design and Planning
1. Conceptualize Your Car:
Research: Before sketching out your dream car, it’s essential to conduct research to gather inspiration. Look at existing car designs, concept cars, and various styles to get a better understanding of what you want your dream car to look like. Consider elements such as body shapes, headlight designs, grille styles, wheel arches, and other distinguishing characteristics.
Functionality: When envisioning your dream car, think about its practical aspects. Consider the interior layout, seating arrangements, cargo space, and any unique features or technologies you want to incorporate. Thinking about functionality at this stage will help you create a more realistic and feasible design.
Materials and Construction: Explore different materials and construction methods that you envision for your dream car. Consider the feasibility and practicality of using specific materials such as carbon fiber, aluminum, or other composites, and think about how these choices will impact the car’s performance, weight, and aesthetics.
Environmental Impact: If sustainability is important to you, consider how your dream car will address environmental concerns. This could involve exploring alternative fuel options, hybrid or electric powertrains, or aerodynamic features that improve fuel efficiency.
Safety and Regulations: Research safety regulations and standards that your dream car design needs to adhere to. Consider how your design can incorporate safety features while still maintaining the aesthetic and functional aspects of your vision.
By considering these factors, you can create a more comprehensive and detailed vision for your dream car. This will provide a solid foundation for the subsequent steps in bringing your dream car to life.
2. Research and Inspiration:
Gather inspiration from various sources such as car magazines, movies, and online platforms. Study different car models to understand their design elements and engineering principles. Analyze successful car designs to identify trends and innovative features. This research will help you refine your concept and incorporate practical considerations into your design.
Part 2: Material Selection and Preparation
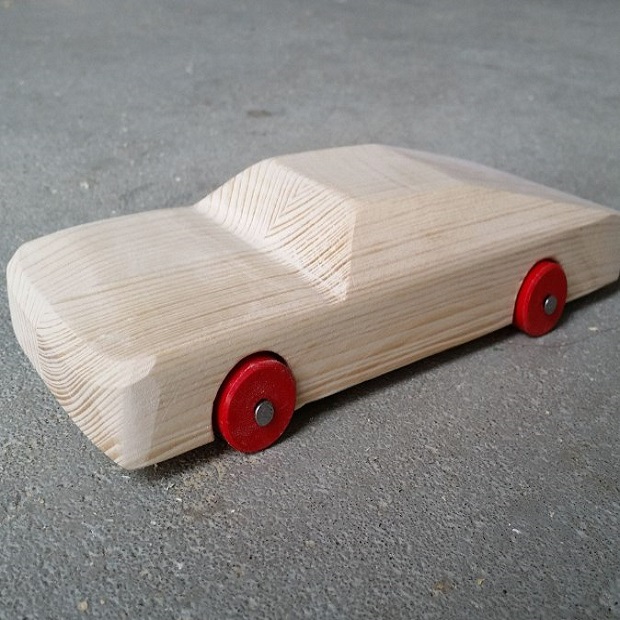
1. Choose Your Materials:
Strength and Weight: Consider the strength-to-weight ratio of the materials you choose. For a car model, it’s important to select materials that are sturdy enough to support the structure while keeping the weight manageable. Lighter materials like foam board or plastic can be advantageous for minimizing overall weight, while still providing structural integrity.
Aesthetics and Finish: Think about the aesthetic qualities and finish that each material offers. For a basic model, a smooth and paintable surface may be achieved with materials such as cardboard or plastic. However, if you desire a more refined appearance, you may opt for materials like metal or resin, which can be polished, painted, or coated for a premium finish.
Assembly Method: Consider the assembly methods and techniques that are compatible with the chosen materials. For example, while plastic and wood may be easily cut and glued or screwed together, metal and resin may require specialized tools and techniques such as welding or casting.
Environmental Impact: If environmental considerations are important to you, think about the sustainability of the materials. Recyclable or bio-based materials may align with your eco-friendly goals, while also providing a unique touch to your project.
Cost and Availability: Assess the cost and availability of the materials. While some materials may be readily available and cost-effective, others, such as specialized metal alloys or composites, may require more effort to source and be costlier to acquire.
By carefully evaluating these aspects, you can make an informed decision about the most suitable materials for bringing your dream car model to life.
2. Prepare Your Workspace:
Set up a dedicated workspace for your car-building project. Clear a spacious area to accommodate your materials and tools. Organize your workspace efficiently to streamline the construction process. Having a well-organized workspace will enhance your productivity and minimize frustration.
Part 3: Construction and Assembly
1. Build the Car Body:
Reinforcement and Support: Consider adding reinforcement and support structures to the main body to ensure stability and durability. This might involve adding internal ribs, braces, or additional layers of material to critical areas, especially if the car model will be handled or moved frequently.
Integration of Components: Plan for the integration of other components such as the wheels, axles, and any interior or exterior features. Ensure that the body structure accommodates the installation and support of these elements, and that they are properly aligned and well-secured.
Surface Preparation: If you plan to paint or finish the body, prepare the surface accordingly. This may involve sanding, priming, and filling to achieve a smooth and even surface for the desired finish.
Testing and Adjustment: After constructing the main body structure, test the overall symmetry and alignment of the components. Make any necessary adjustments to ensure that the car looks and functions as intended.
Safety Considerations: Prioritize safety when securing body panels and components. For instance, if using adhesives, ensure they provide adequate strength and are suitable for the materials being joined. Consider the potential for stress points and reinforce those areas accordingly.
By paying attention to these additional aspects during construction, you can ensure that the main body structure of your dream car model is not only visually appealing but also sturdy and functional.

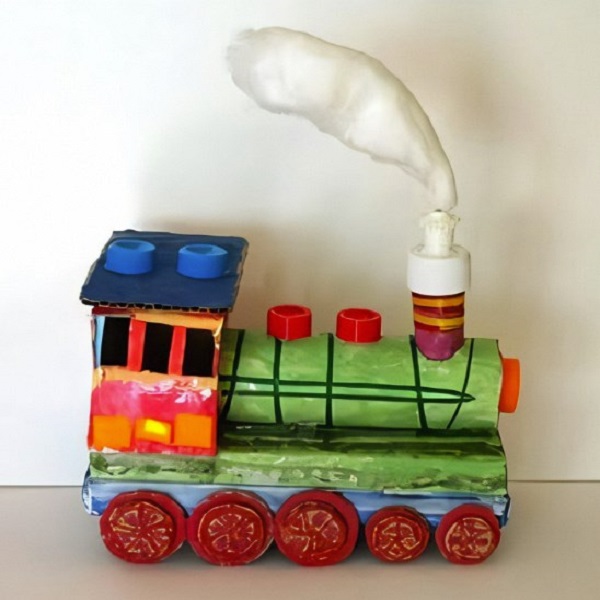
2. Add Details and Features:
Enhance the car’s appearance by incorporating details such as doors, windows, headlights, taillights, and grilles. Create these components using additional materials or by modifying existing parts. Consider adding functional elements like opening doors or a working steering wheel to enhance the car’s playability.
Part 4: Finishing Touches and Refinements
1. Paint and Decorate:
Surface Preparation: Before painting, ensure that the car’s surface is clean, smooth, and free of any imperfections. Sand the body panels, remove any dust or debris, and apply a primer to create a suitable surface for the paint to adhere to. This will help achieve a professional-looking finish.
Color Selection: Consider the color scheme and select colors that enhance the aesthetics of your car model. Whether you prefer a classic look, a vibrant modern style, or a sleek metallic finish, choose colors that complement the overall design and convey the desired personality of your dream car.
Paint Application: Apply multiple thin coats of paint to achieve an even and smooth finish. Use a spray gun or airbrush for precision and control. Allow each coat to dry thoroughly before applying the next, and follow the manufacturer’s recommendations for proper drying times and techniques.
Customization: Add personal touches to your car model by incorporating custom graphics, decals, or hand-painted details. This can include racing stripes, sponsor logos, or intricate designs that reflect your creativity and individuality.
Protective Coatings: Once the painting and customization are complete, consider applying a clear protective coat to seal and protect the paint, adding gloss, depth, and durability to the finish. This can also help preserve the appearance of the car model over time.
By carefully selecting colors, applying paint with precision, and adding personalized details, you can enhance the visual appeal of your dream car model, making it a unique and eye-catching creation.
2. Test and Refine:
Once the car is assembled and painted, test its functionality and durability. Identify any areas that require adjustments or improvements. Make necessary modifications to ensure the car performs as intended. Pay attention to the car’s balance, stability, and overall quality.
Additional Tips:
Take your time and enjoy the process.
Don’t be afraid to experiment with different designs and materials.
Collaborate with others to share ideas and techniques.
Document your project with photos or videos to capture your progress.
Display your finished car proudly as a testament to your creativity.
By following these steps and incorporating your own unique ideas, you can create a one-of-a-kind toy car that reflects your imagination and craftsmanship.


